
The last two days I was busy making a child's bookcase. The top measures 26 1/2 x 12 inches and is 32 3/4 inches high. The shelf depth is 11 inches which is a good depth for magazines and the big children books. Ok, lets start cutting some wood...
I'm using cabinet grade 1/2 inch plywood for the case and pine for the trim and top. So, first thing we make is the case and that means cutting down the 4x8 sheet of plywood. The half inch plywood isn't too heavy, compared to the 3/4 stuff, so getting the sheet up and positioned on my table saw isn't too bad (so I tell my back anyway). The fence is set at 11 1/4 inches (the face frame is 3/4, making the overall depth of the case 12 inches)...

I made two cuts, I need enough for the sides, bottom, shelf, and sub-top. Before cutting the second piece, I adjusted the fence to 11 inches even. This piece will eventually become the bottom, shelf, and sub-top which are narrower due to the 1/4 inch back. You'll see what I mean in a bit...

Here I setup my table saw to cut the 24 inch sides from the first piece of plywood I cut earlier. A few things to take notice in this picture. I set the fence at 25 inches and placed a 1 inch spacer block to the fence, so in effect the piece will be 24 inches. Why do this, you might say... Well its a great way to make multiple cuts all the length safely. The keyword is safely. The other reason I like this setup is that I can move the piece past the spacer and slide it to the right about an eighth of an inch. This allows me to cut the rough edge off with the next cut.

As you can see the piece of plywood I'm about to cut is 8 feet long, the possibility that the piece would jam and kickback is pretty high if a spacer isn't used along with a table saw sled. I also have an arm off the side of my saw to help support long pieces as I make cuts.

This is the first side, after making the first cut, I flipped the piece and made another pass. Now I have one side that's square and 24 inches.

I continued to make the next cut from the same piece and here are the two identical sides.

Using the same setup but only changing the fence to 24 1/2 inches. The bottom, shelf, and sub-top are all the same size. This is very important because if one were longer or shorter the sides of the case would bow in or out not making for a nice bookcase to look at...

The 1/4 plywood back is cut the same way as the sides, except a bigger sled is needed.

I installed a dado blade on my table saw. Basically, its a bunch of blades stacked together to remove a wider groove or dado than a regular blade. A regular blade removes about 1/8 inch with one pass, the dado blade can remove from 1/4 to 1 inch. Now be careful, the fence is calibrated to the regular saw blade, so always use a ruler to measure the distance from the fence to the cutter. Also, keep in mind how you make the cut and where you want the cut to be in the piece you're cutting. Here I need the top of the bottom to be 4 inches from the floor. So, I measure from the fence to the outermost cutter, 4 inches. I mark all the pieces as I cut them with chalk. Not only does it keep everything organized (reducing errors) but it makes it easy to orientate the piece before making the cut. (Two left sides don't make for a good bookcase.)
Oh, by the way, in case you're not sure what a dado is... a dado is a groove that is cut across the grain and a groove is cut with the grain.

I setup my fence with a sacrificial fence to make the rabbets for the sub-top and back. This way I can use the same dado blades (which are 1/2 wide) for the 1/2 dados for the bottom and shelf. And for the 1/2 inch rabbet along the top edge and the 1/4 inch rabbet along the back edge of the sides for the plywood back. But first I make a couple of test cuts. I use a piece of scrap and test the fit using the sub-top.

Test fit looks good! (only took two tries this time)

I made all the cuts and here are the sides, they look pretty good! Glue it up!!

Not so fast! There's one more step. You'll need to get out you router plane. What the heck is that, you're thinking. This ingenious device has an adjustable cutter (basically a chisel) that's used to even out the bottoms of dados and grooves. Since its impossible to make an even cut through the table saw, there will almost always be some high spots.
Ok, the trick with any chisel or plane is to take baby steps. Only remove a small amount of wood at a time. So, what I do is start in the middle and set the cutter flush to the bottom. Slowly, I said slowly, move the plane towards on end with even downward pressure.

This dado wasn't too bad, the plane started to cut the high spot near the edge. This is a feel thing, if you feel its going to remove to much material back off and take baby steps. You want a smooth even surface.

Ahh, now thatsanice dado...

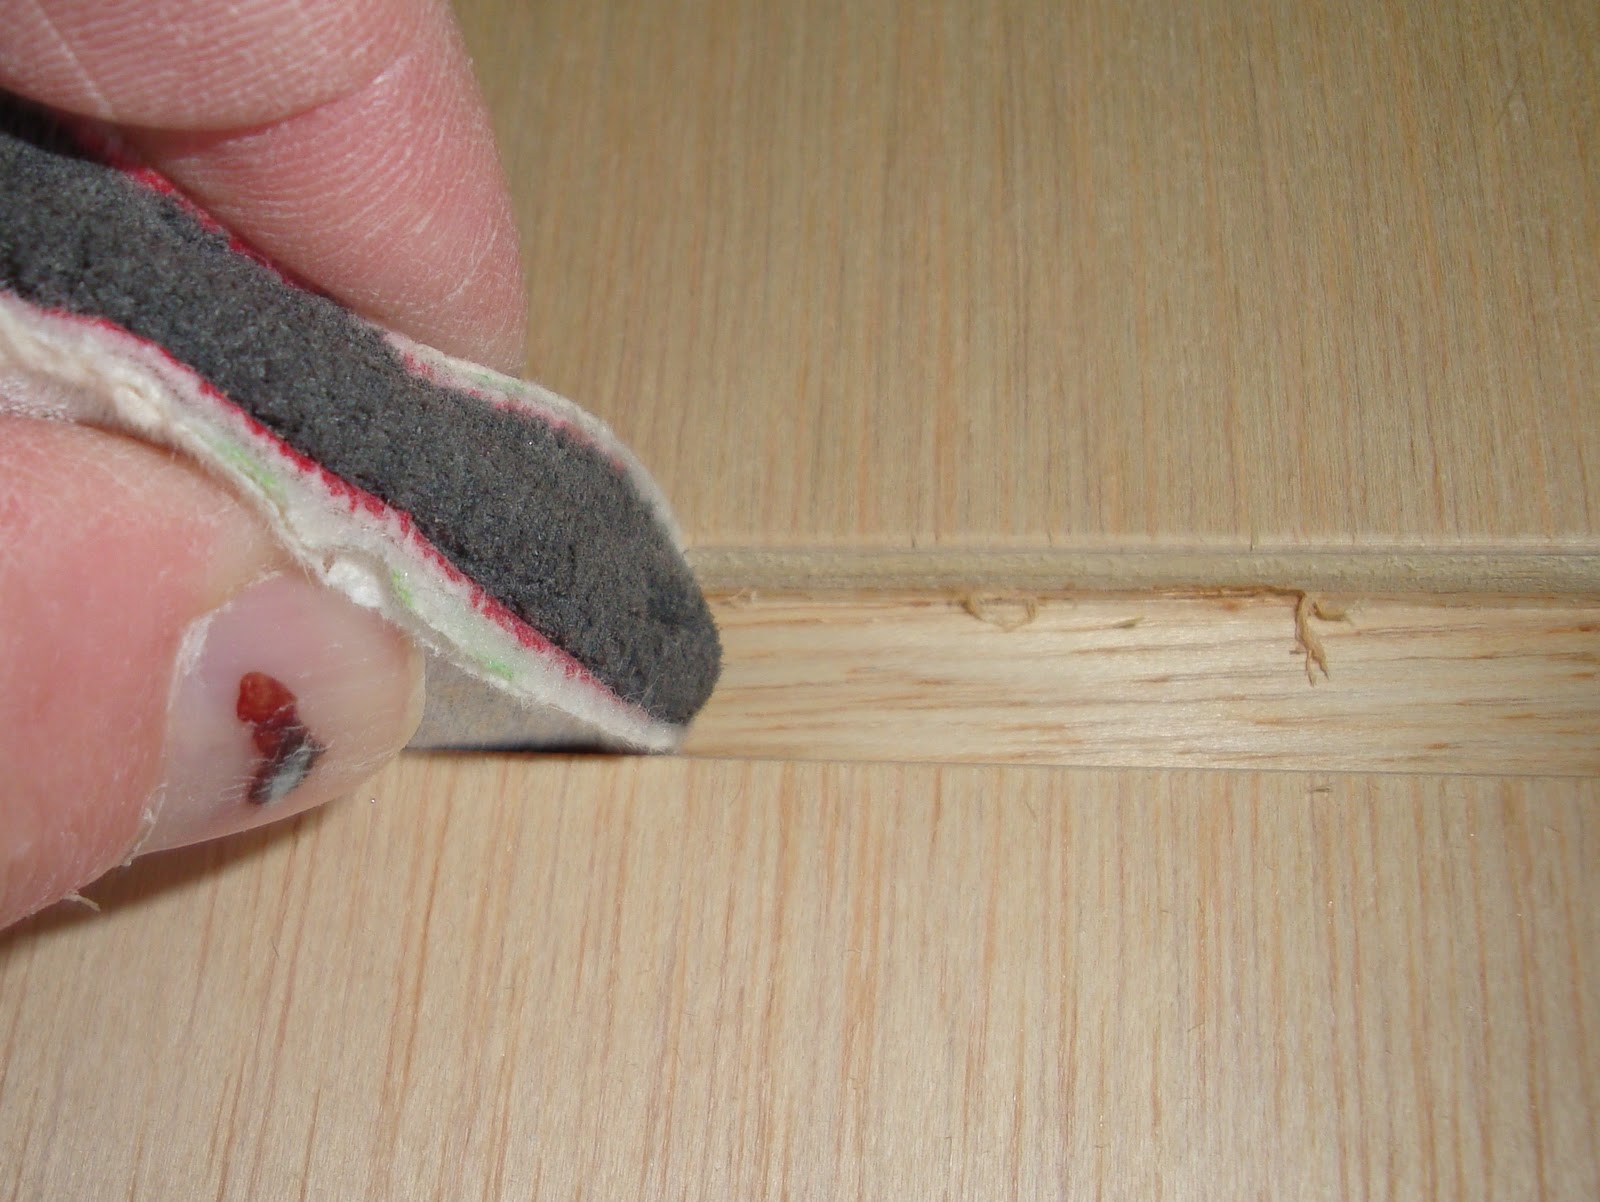
Here, I'm just knocking off the edges of the dados. With plywood, it has a tendency to catch as you dry fit pieces. This helps prevent ripping the veneer when removing the shelves, etc.
Now for the dry fit. No glue yet, let make sure everything fits together nice first. I tap the bot and shelf into place, so everything is even.

Nice! (I hope I can get it that good when there's glue in the joint.)

The back looks like a good fit too..

I do a quick sanding before I glue it up. Its just easier this way.

See those yellow lines, that's glue! And I don't use anymore than that for dados. Its just enough to hold the shelf and bottom tight with very little squeeze out. (Which means less work for me later on, and that's a good thing.)
Actually, the yellow glues (or carpenters glues) they make today are stronger than the actual wood itself!

After tapping the bottom into place, I use a square to position it close to square while I tap in the shelf.

After putting together both sides and the bottom and shelf, I put a line of glue all around the back edges for the plywood back.

I use a straight edge to line up the back with the side bottoms then use a few brads to hold it in place until the glue drys. Since the back is square and the same length as the sides, there's a pretty good chance the case will be square.

Here's a little trick I use to nail the back to the bottom and shelf edges. See that pencil mark? Its right there next to the 6 1/2 on the ruler. The mark is the center of the thickness of the bottom, there's another mark on the other side. So, I use my rule to kinda connect the dots. I leave just enough room for the nail gun, so the nail goes into the center of the bottom.

See!!? No nails, they all went nicely into the shelf.

But is it square? Well lets check, to check for square you take two diagonal measures and if they are the same, its square! Here's one measurement, 40 5/16, remember that...

Here's the other measurement, 40 5/16, wahoo! With the case done we can move onto the face frame.

Using the same setup as before, I cut all the pieces for the face frame.

I marked all the pieces, T - top, M - Middle, B - bottom. I also placed the mark on the right, that tells me the orientation as well. The top and middle rails are blanks.

I already had a template to make the whimsy rails, so I traced the pattern onto the blanks.


On the band saw, I remove most of the waste, leaving about an 1/8 of an inch. Notice how I'm using a series of cuts to make the curves.

Then I follow the cuts to remove the waste, as shown on the left.

The blanks are now ready to be attached to the template.


With the blank attached to the template, I adjusted my router so that the flush trim bit's bearing is riding along the template. This will leave a clean cut and the rail blank will be exactly like the template.

Look, we have twins! The rails are now ready for dry fit...

Looking good so far...

You're looking at the shelf, see the lip from the rail? That's what we want, we'll trim that flush later.

I mark the position of the rails.

The face frame is put together using pocket hole joinery. There are a few advantages in using this type of joinery. First, you really don't need to line anything up when making the pocket holes in the rails.

The pocket holes are cut, I usually stay 3/4 inch away from the edges for more strength.

Now here I line up the stile and the rail. I use a special clamp that helps keep everything in place. Then I simply screw in the pan head screws. It doesn't get any easier than that!

Nice!

Ok, for the middle rail I have to transfer the mark I made earlier to the back side of the stiles. This allows me to line up the middle rail in the correct position when clamping.

This is one side I clamped, lines up! The other side lines up also, so all I do is drive the pan head screws into the pocket holes.

And here is the face frame, its just clamped into place to check for fit. It looks good, so now I mark all the places that I will put biscuits. Biscuits use on face frames is a good choice because they help line things up and are very strong. The biscuits actually absorb moisture from the glue and expand. Pretty cool, right!?

The dry fit with all the biscuits installed (except for the one for the middle rail), its looking good.


Looks good!

Ok, I glued everything up and attached the face frame. Now I check for and remove the glue squeeze out. I use a piece of scrap, wedged shaped, to remove the glue. It works pretty good!

Its all clamped up, you really cannot have enough clamps...

I double check for squeeze out and remove it with my wedge scrap.

To even out the shelves and rails, I use a card scraper. The simplest tool in the box, its just a piece of metal, but its the most useful. When sharpened, this tool will remove very fine shavings leaving a very clean surface.


The sides get a sanding. Notice the lack of dust? That's because the Festool Dust Extractor does an awesome job removing the dust.

The trim is next. I had made extra trim from another project (the cat litter cabinet), so all I need to do is lay it out for cutting. I try to work around the knots and I mark the pieces.

I have a 45 degree sled that I use to cut miters. Its zero clearance, so I can use the kerf cut to line up with my mark.

The same sled also makes 90 degree cuts. I use it to make the second cuts for the side trim.

I start with the front trim piece, this requires two miters. I cut one miter then place it on the bookcase. Then I use the side trim to get an accurate measurement.
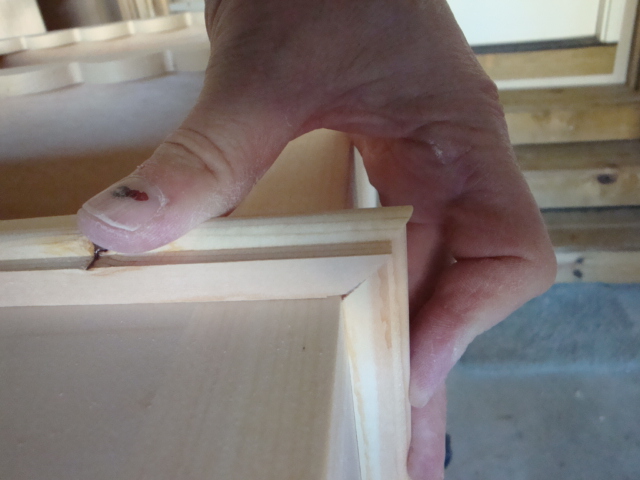
The dry fit looks good! Oh wait, its kind of long! I just mark that length and cut it to fit. I apply a little glue and brad nail the trim to the bookcase. The square helps me keep things square while I'm nailing.

Trims done! Looks good, eh?

Ok, the last step before the finish, is the top. I setup a cove and round over bit in my router table. I use a piece of scrap to get the adjustments setup correctly.

The top is ready to be cut from a laminated pine board. I like the laminated board for these projects because the bookcase is going to be painted and not stained or oiled.

A quick dry fit and fitting, I make marks along the bottom.

Before I start running the top through the router, I use chalk to orient the board. The last thing I want is to cut the profile on the wrong edges or side!

The first thing I do is make a back cut. That's where I feed the board into the bit backwards, just a little to prevent tear out.

Looking good!

The bookcase is ready for a prime and painting.

First, a quick tack clothing, to remove any dust.

I use the Glidden Gripper primer, works great!

The bookcase is all primed and ready for a coat of paint.

But WAIT! We need to do a quick/light sanding and tack clothing before we paint.

The bookcase with one coat of primer and paint. Look pretty good, but not good enough! Always take the time to apply a second coat of paint. The second coat gives the case a better finish and covers any spots you may have missed the from the first coat.

A quick sanding/tack clothing before the second coat.

Ahhh, finally... The finished child's bookcase!


And the most important part... burn in your name on the back. :)

Thanks for visiting and I hope you like this post. Remember, all comments are welcome. Check again for more posts...
Is this for sale?
ReplyDelete